
Locations
The Kindlewastes is a documented source of mineable Iron Ore. For a specific destination, use Ridgeback Mine, which appears in both the Iron Ore reference and the current mine location page.
If the Blacksmith has offered Hearts Of Iron, track it in your Journal. The quest's objective marks Ridgeback Mine as the iron mine to reach. This gives you an in-game destination rather than a coordinate copied from a different map.
Without that quest marker, open the mine's location map and plan an approach from your explored area. You can also choose “Where to mine Iron Ore” on the ore listing for alternative deposits.
Ridgeback Mine map
The yellow diamond labelled Ridgeback Mine is the destination below. The surrounding red-ringed ore icons are Iron Ore deposit markers on the selected map layer. A marker locates a deposit; it does not trace a safe path through the cave.
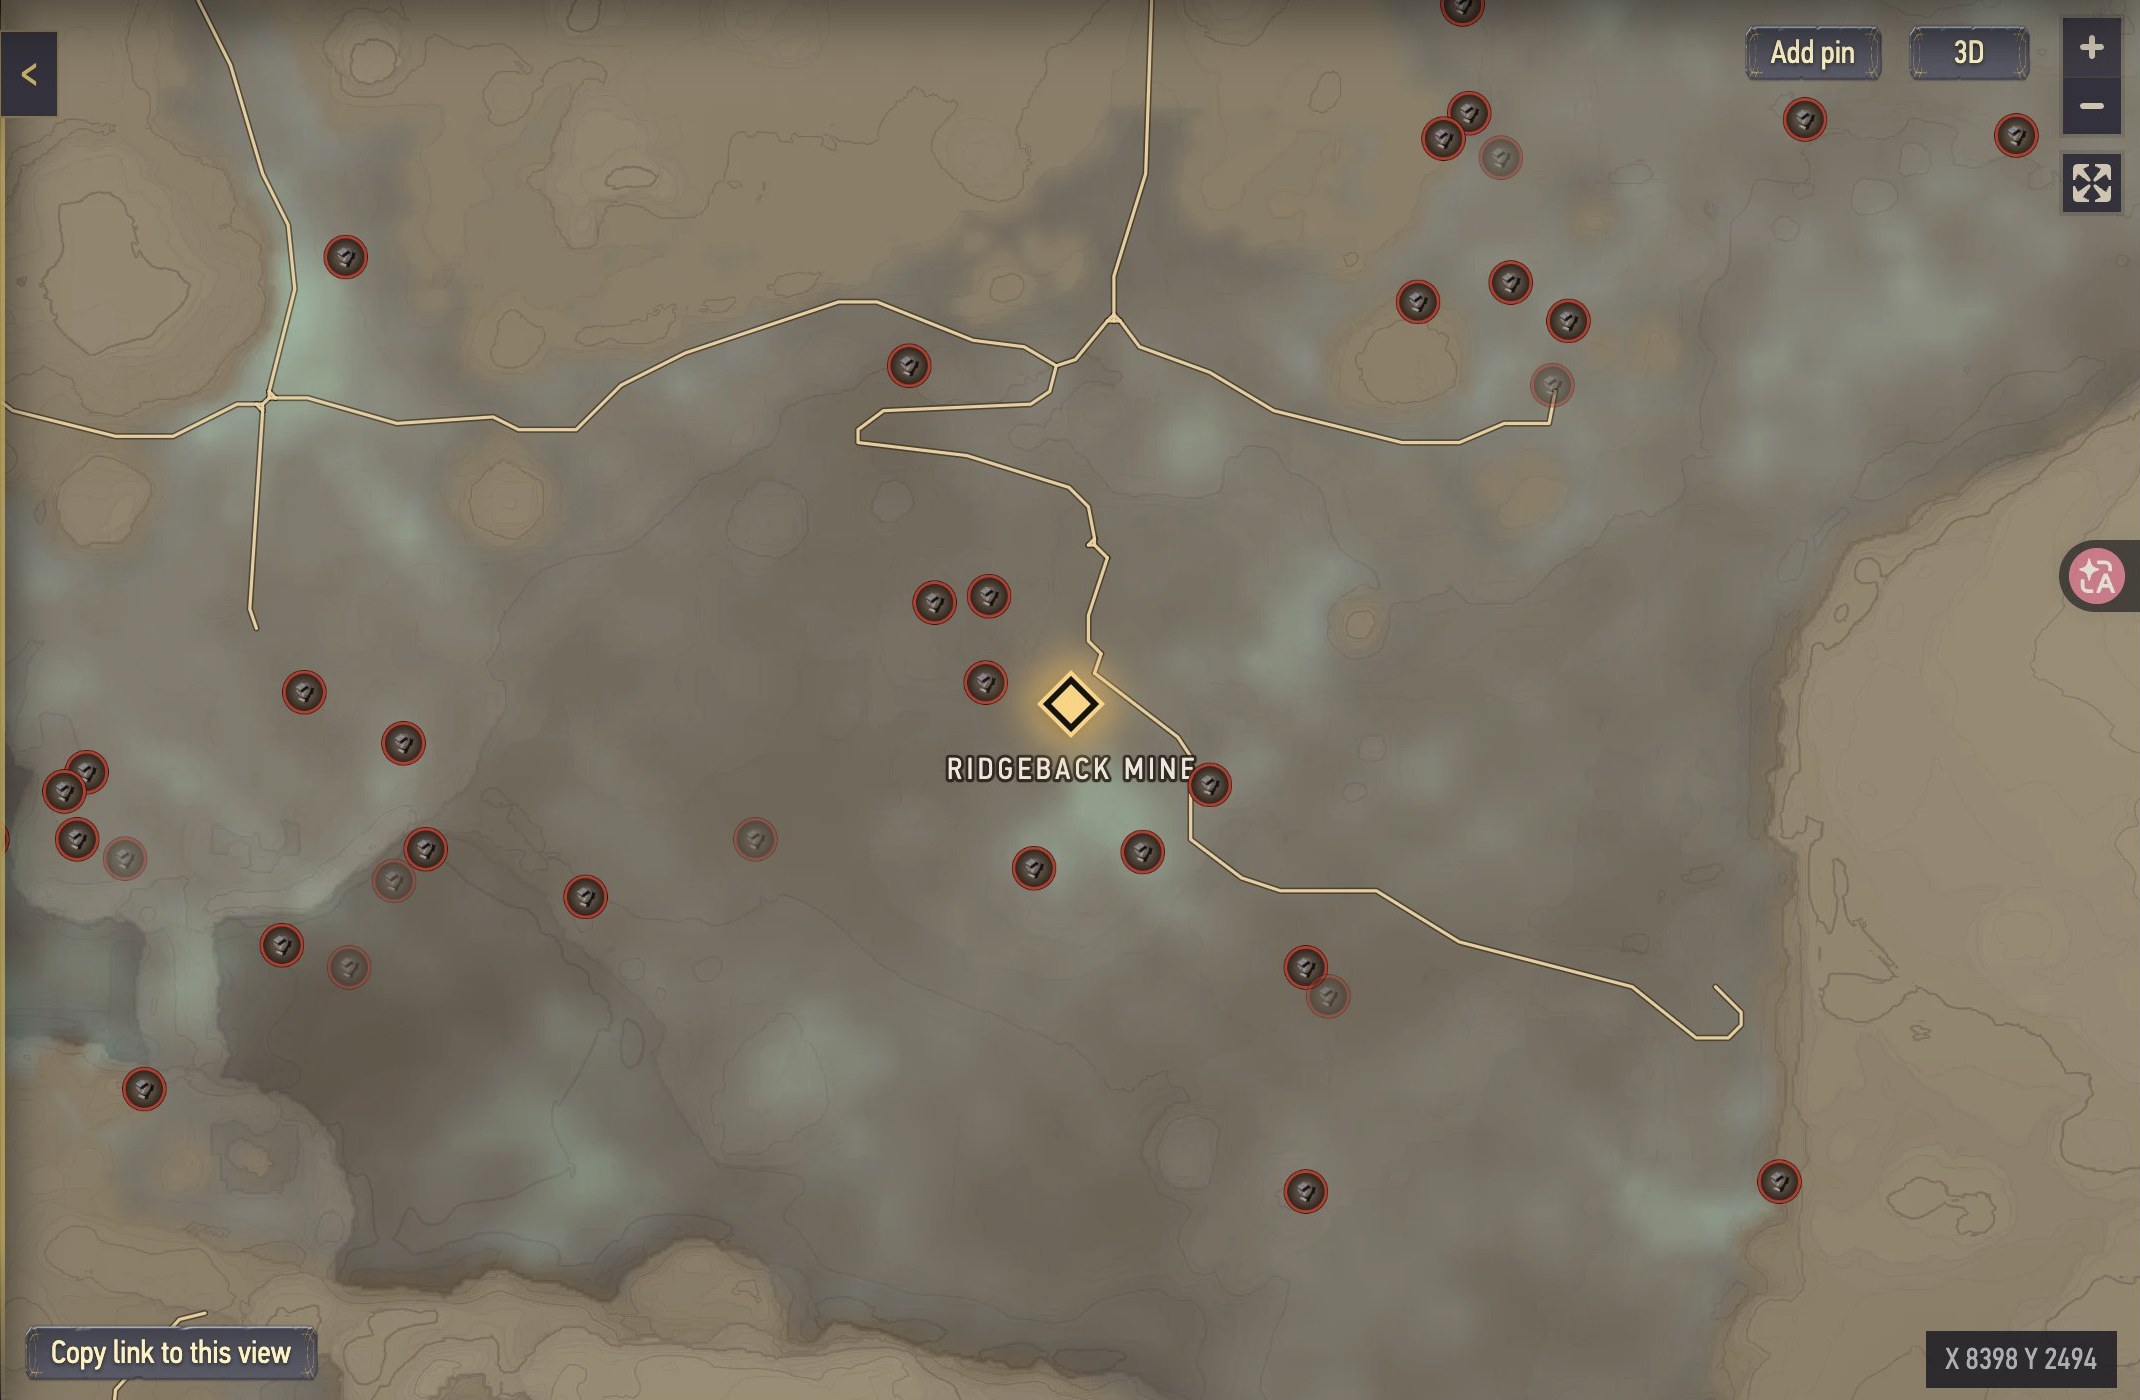
Open Ridgeback Mine on the live map ↗. Keep the mine name visible and inspect a deposit before setting off.
Before you go
Ridgeback Mine is in the Shroud and has hostile creatures recorded nearby. Plan this as an expedition, rather than assuming that a resource location is automatically safe to visit.
- Inspect your current protection. If the area's Shroud warning says it is beyond your Flame progression, work on strengthening the Flame before committing to the mine.
- Repair and pack. Bring a serviceable pickaxe, combat equipment, food and backpack space. A second pickaxe helps if your target is larger than a short first batch.
- Choose a return path before mining. Identify the entrance and the route back out of the fog. Do not assume the edge of a cave or a high ledge is a usable exit.
- Set a batch target. For the basic Smelter recipe below, 10 Iron Ore is one complete input batch. Gather more only while your remaining timer and durability allow it.
The beginner checklist covers the base, food and Rested preparation loop. Use the timer shown in your own world instead of a fixed allowance from a video.
Mining route
- Reach the marked mine area. Keep the Journal objective or linked map available so that you can distinguish Ridgeback Mine from another cave.
- Check immediate threats and the exit. Clear space around the position you will mine from, and note the way back before moving farther inside.
- Find an exposed vein and test it. Mine a small amount, then check the pickup name. The result you want is Iron Ore.
- Continue until you have the planned batch. Check the count, pickaxe durability and Shroud timer periodically. Stop before a fight or wrong turn would consume your exit margin.
- Leave the Shroud and return home. Store the ore and prepare the station inputs before planning another trip.
Success check: you have Iron Ore in your inventory and enough time to return safely. Reaching the quest marker alone does not mean you have mined the quantity needed for crafting.
If a deposit is inaccessible or already worked out, return to the ore map and choose another reachable vein. The current database also lists iron outside the Kindlewastes, including the Albaneve Summits. Those are alternatives for appropriately progressed characters; a higher-region detour is not required for this first route.
Recognize the vein
Look for the lumpy mineral surface visible ahead of the character in this frame from HeRo Survival Guides. The same video's 01:05 mining scene displays Iron Ore ×2, confirming the material. This is a separate cave-passage example, not a picture of the Ridgeback Mine deposit marked above.
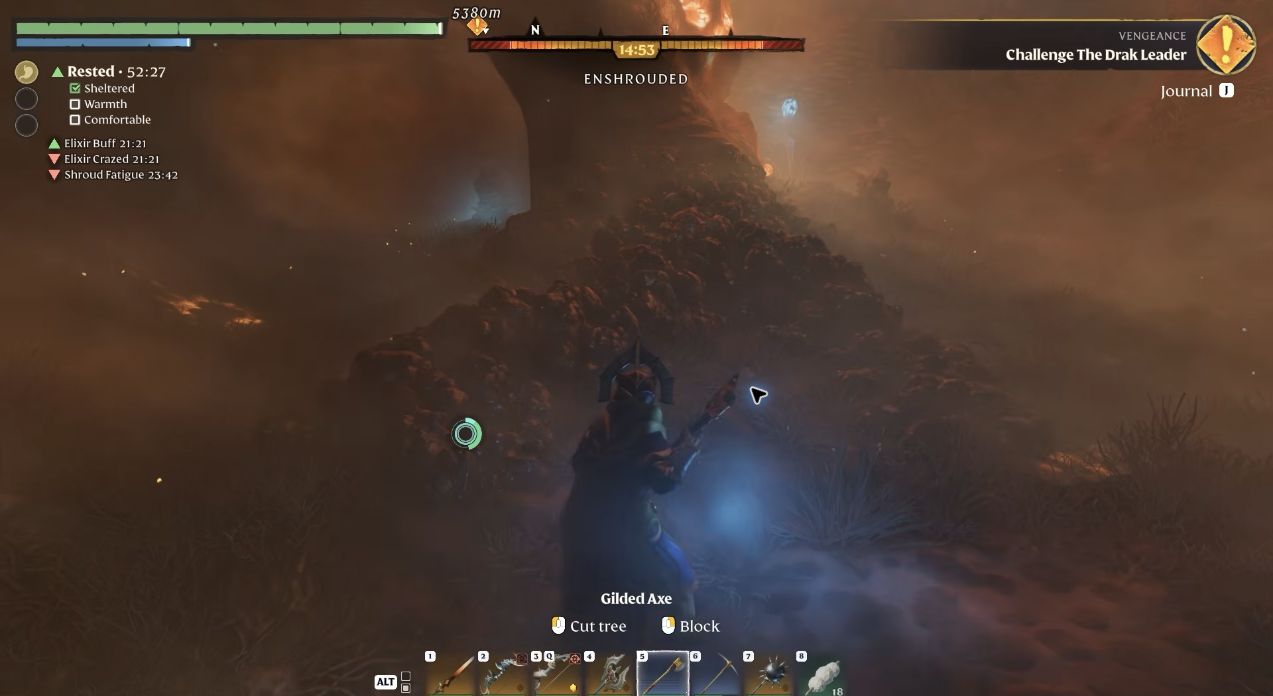
Fog and lighting change its apparent colour. The blue outline shown once the pickaxe is equipped is a targeting overlay, not the untouched vein's natural colour. Use a test swing and the pickup name as your final check.
Confirm Iron Ore
In wak4863's Ridgeback Mine footage below, the left-hand pickup list says Iron Ore three times. Read that name in your own game rather than identifying the resource from the pickaxe name or the rock colour alone.
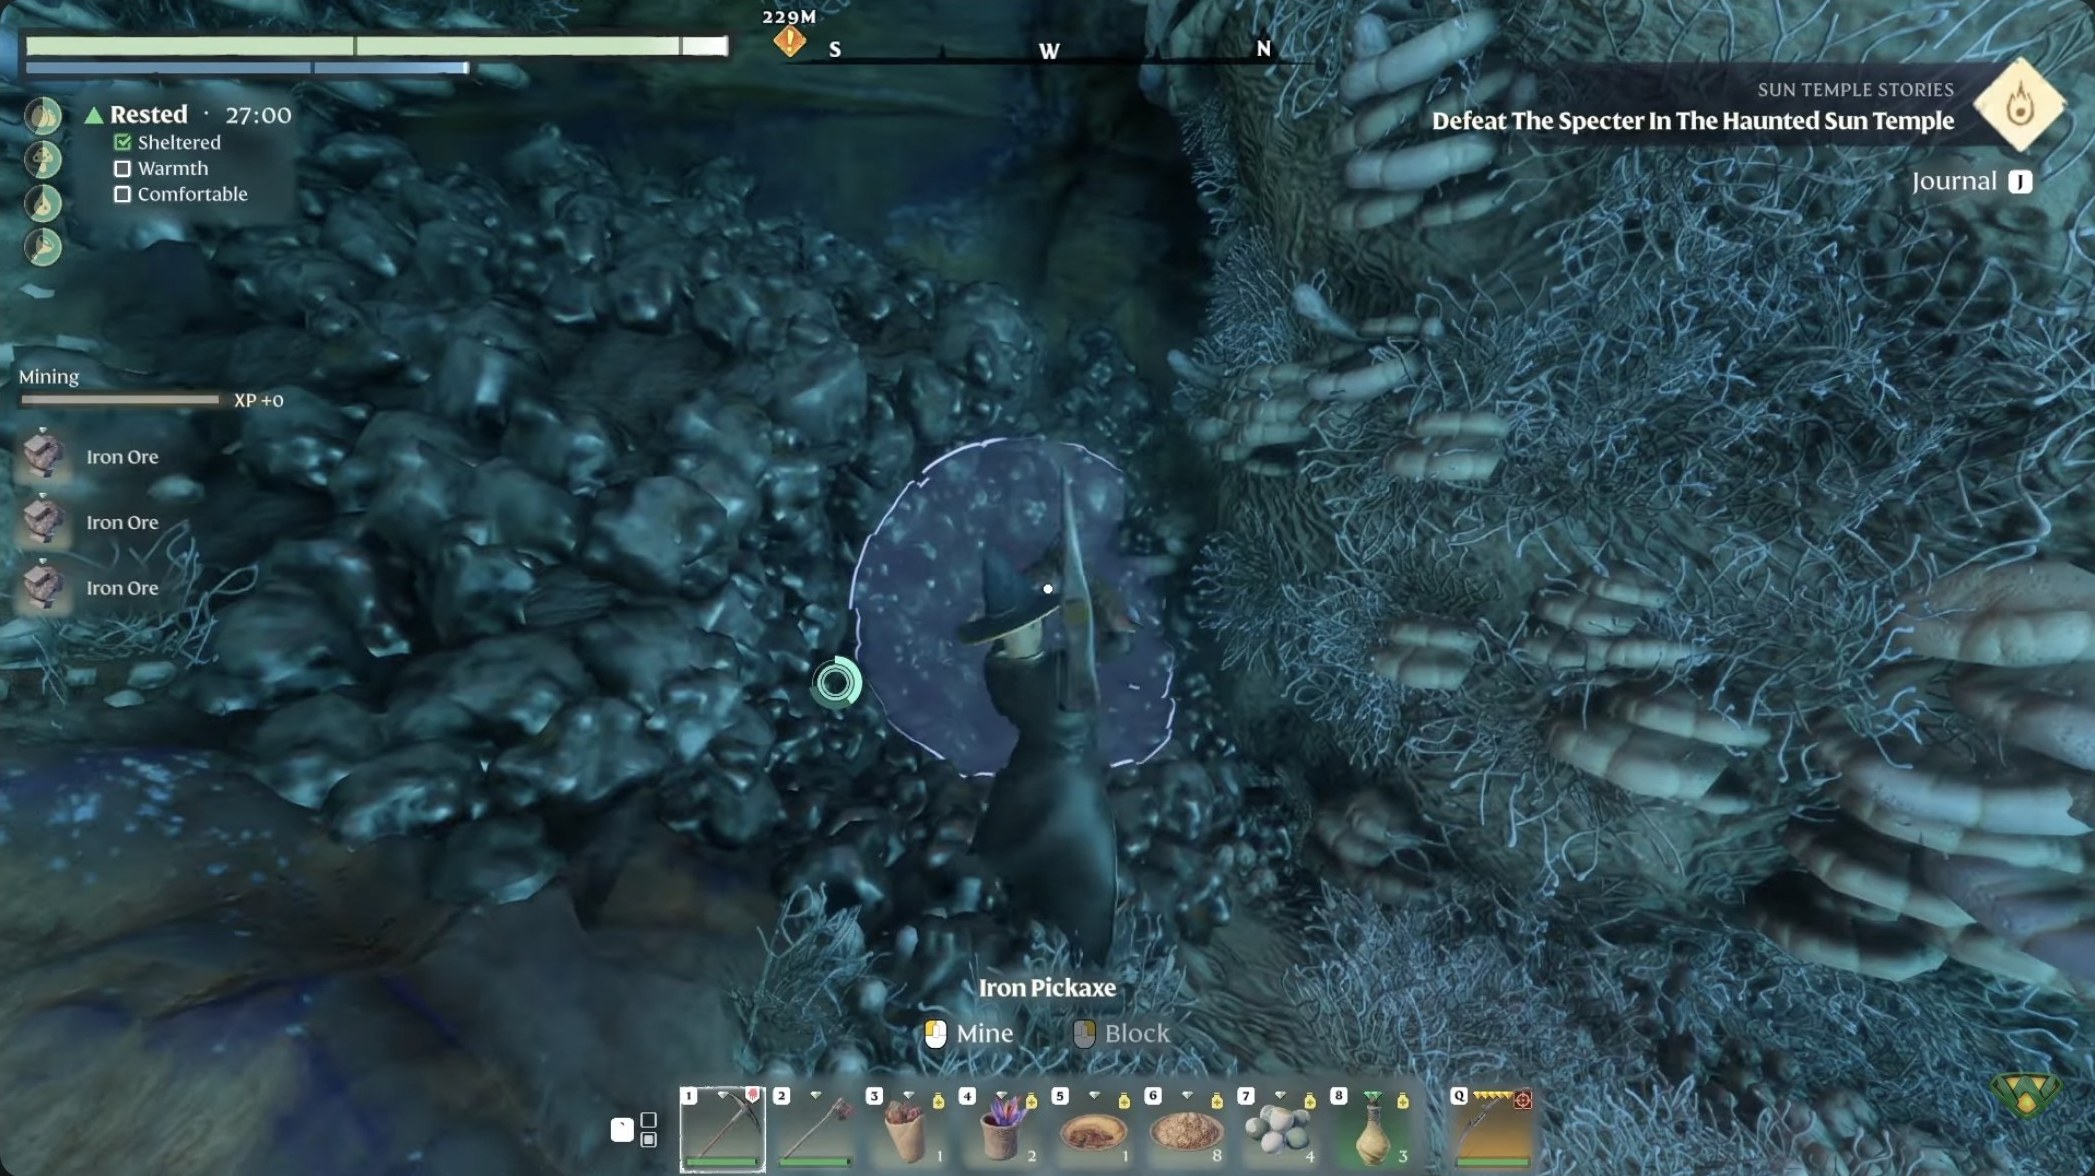
This is older footage. Use it to understand the confirmation step; consult the current map and your in-game warning for the trip. Three notifications are an example, not a guaranteed yield, and the creator's pickaxe and displayed timer are not entry requirements established by this guide.
Video references
The Best Location for Iron Ore in Enshrouded
wak4863
Older Ridgeback Mine footage. The pickup scene at 04:40 shows the item name to check after mining.
Watch the Iron Ore confirmation ↗For the separate cave-passage identification example, watch HeRo Survival Guides' vein at 01:00 and Iron Ore pickup at 01:05. These selected scenes were visually checked on November 1, 2026; they are not a complete route test or proof of a specific game version.
Smelting
The basic Smelter can make Iron Bars. You do not need to complete a Blast Furnace first just to process this batch.
| Station | Ingredients | Output | Listed time |
|---|---|---|---|
| Smelter | 10 Iron Ore, 20 Charcoal | 10 Iron Bars | 5 minutes |
| Blast Furnace | 20 Iron Ore, 40 Coal | 20 Iron Bars | 5 minutes |
These batches are listed in the Iron Bars reference. Coal and Charcoal are separate materials: use the fuel named by your chosen station.
Put the ingredients into the matching recipe and confirm that processing begins. When it finishes, collect Iron Bars and check the equipment or building recipe that sent you mining. That final recipe may have its own survivor, station or progression requirement.
Troubleshooting
Wrong material
Read the full ingredient name. Metal Scraps, Iron Ore and Iron Bars are different resources. Scrap collected from objects is not a replacement for a recipe that specifically needs bars; ore must first be smelted.
Missing recipe
Check the station and your Blacksmith crafting progression. The published recipe lists collecting Iron Ore and placing a Smelter as one unlock path. The Crucible quest explains the earlier station unlock.
Map coordinates
Use the named mine or the current deposit map instead. Coordinate labels depend on the map being used; a number pair without that map is not a reliable instruction. This route does not require a particular numbered grid, a guaranteed yield or a relog reset.
Sources
Checked October 31, 2026, for the 1.0 era. Enshrouded.tools labels its data as game build 25988036. The route is based on published quest and deposit information; this site has not performed an in-game route or yield test.
- Iron Ore: mining and Ridgeback Mine
- Ridgeback Mine: Shroud, creatures and ore
- Hearts Of Iron: mine marker
- Iron Ore: deposits in different regions
- Iron Bars: batches and unlock conditions
- Crucible Needed For A Smelter
Visual references
Media checked November 1, 2026. The mine and quest listings were also rechecked on that date. Enshrouded.tools is an unofficial fan database, not the game's official website.
- Ridgeback Mine map with Iron Ore markers: submitted screenshot, checked against its visible mine label and the current location listing.
- HeRo Survival Guides — Iron Ore Location in Enshrouded: cave-passage map, pre-mining vein at approximately 01:00 and Iron Ore pickup at 01:05 visually checked. Its location is kept separate from Ridgeback Mine.
- wak4863 — The Best Location for Iron Ore in Enshrouded: submitted Ridgeback arrival frame and pickup still inspected; original mining/pickup scenes around 04:35–04:40 rechecked in the player. Older footage supports identification, rather than guaranteeing the present cave layout or yield.